Background and Mask Generation#
Before processing your 3DXRD dataset, you will need correction images. The Generate Image from Raw Data widget loads a raw HDF5/NeXus image stack and processes it into a background/flat-field frame and/or a custom pixel mask.
Warning
Please use only the scan with 100-500 frames
1. Computing Background and Flat-Field Images#
Input Configuration#
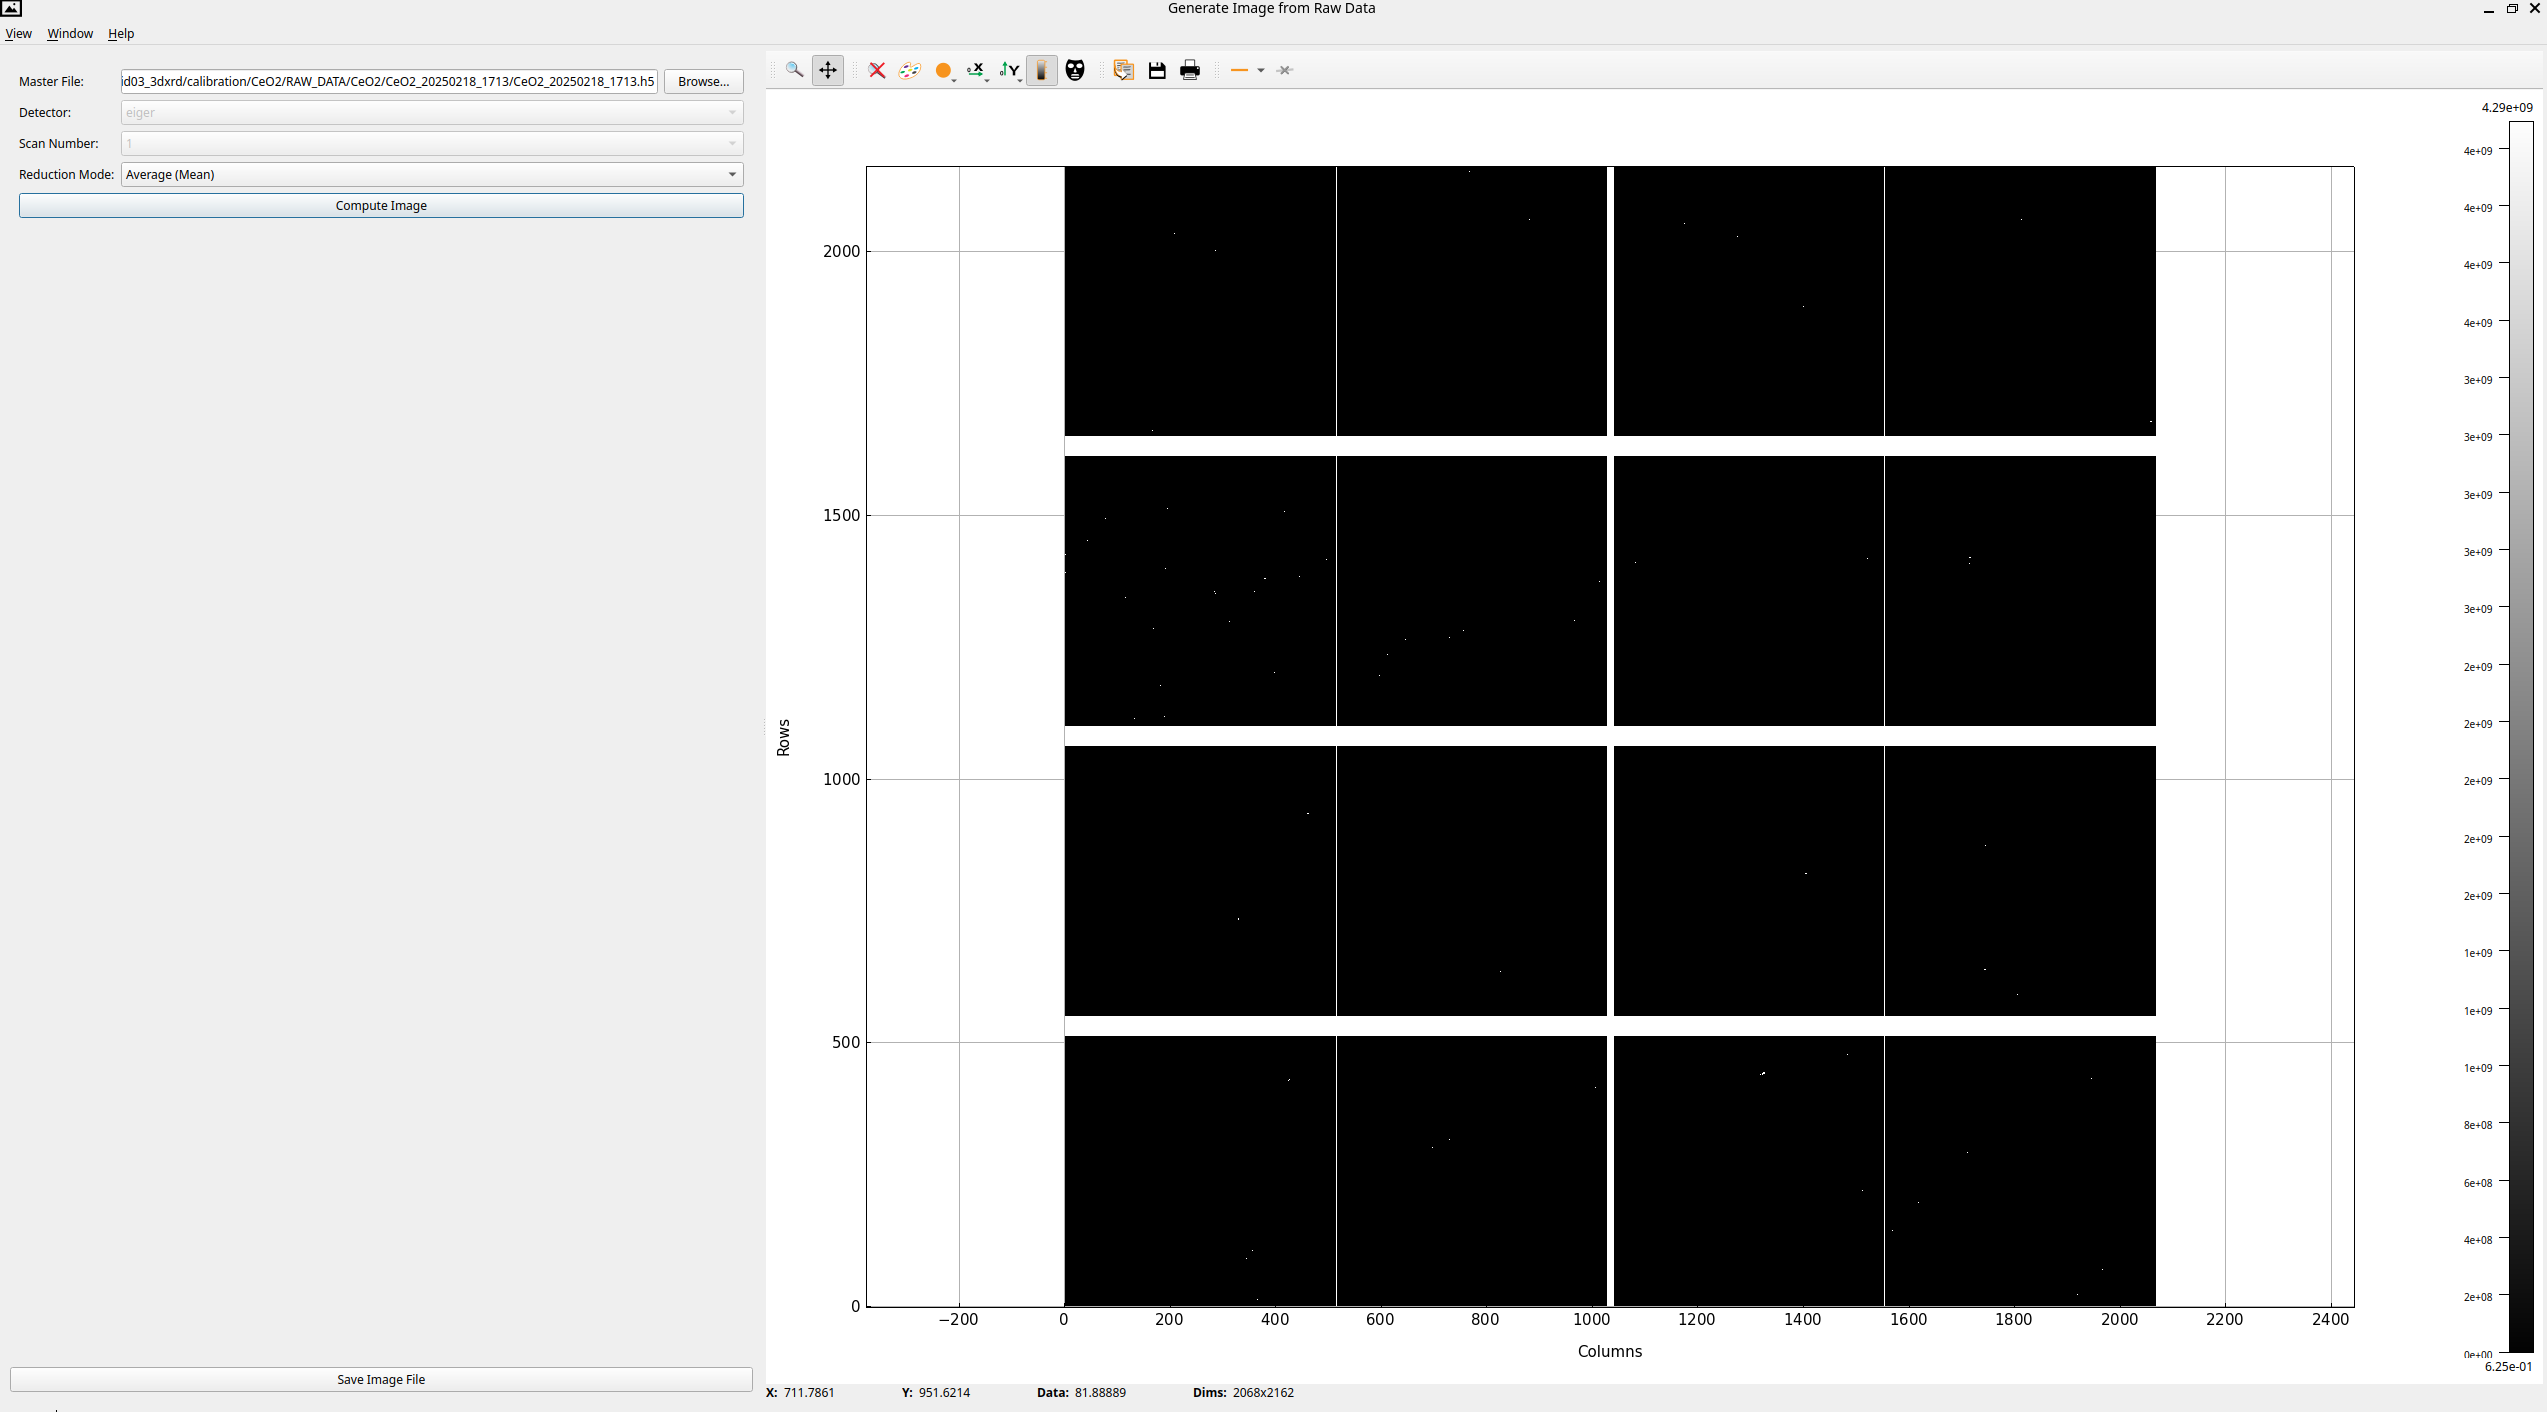
Double-click the widget node to open the control panel and configure your data inputs:
Master File: Select your experiment’s raw
.h5or.nxdata file.Detector: The widget automatically parses the internal structure of the file and locks onto your active detector path. If multiple detectors are found, select the target one from the dropdown list.
Scan Number: Select the scan index containing your correction frame sequences. If only one valid scan is detected, it will automatically be selected.
Reduction Mode Execution#
Because raw background data is loaded as a 3D frame stack (\(N \times \text{height} \times \text{width}\)), you must reduce the stack into a clean, 2D reference correction layer.
Select your target math operation under Reduction Mode and click Compute Image:
AVERAGE.
MAXIMUM
MINIMUM.
MEDIAN.
Once calculated, the image is displayed on the right-hand panel. Click Save Image File save the image to disk as a .edf file.
2. Masking Pixels via Silx Tools#
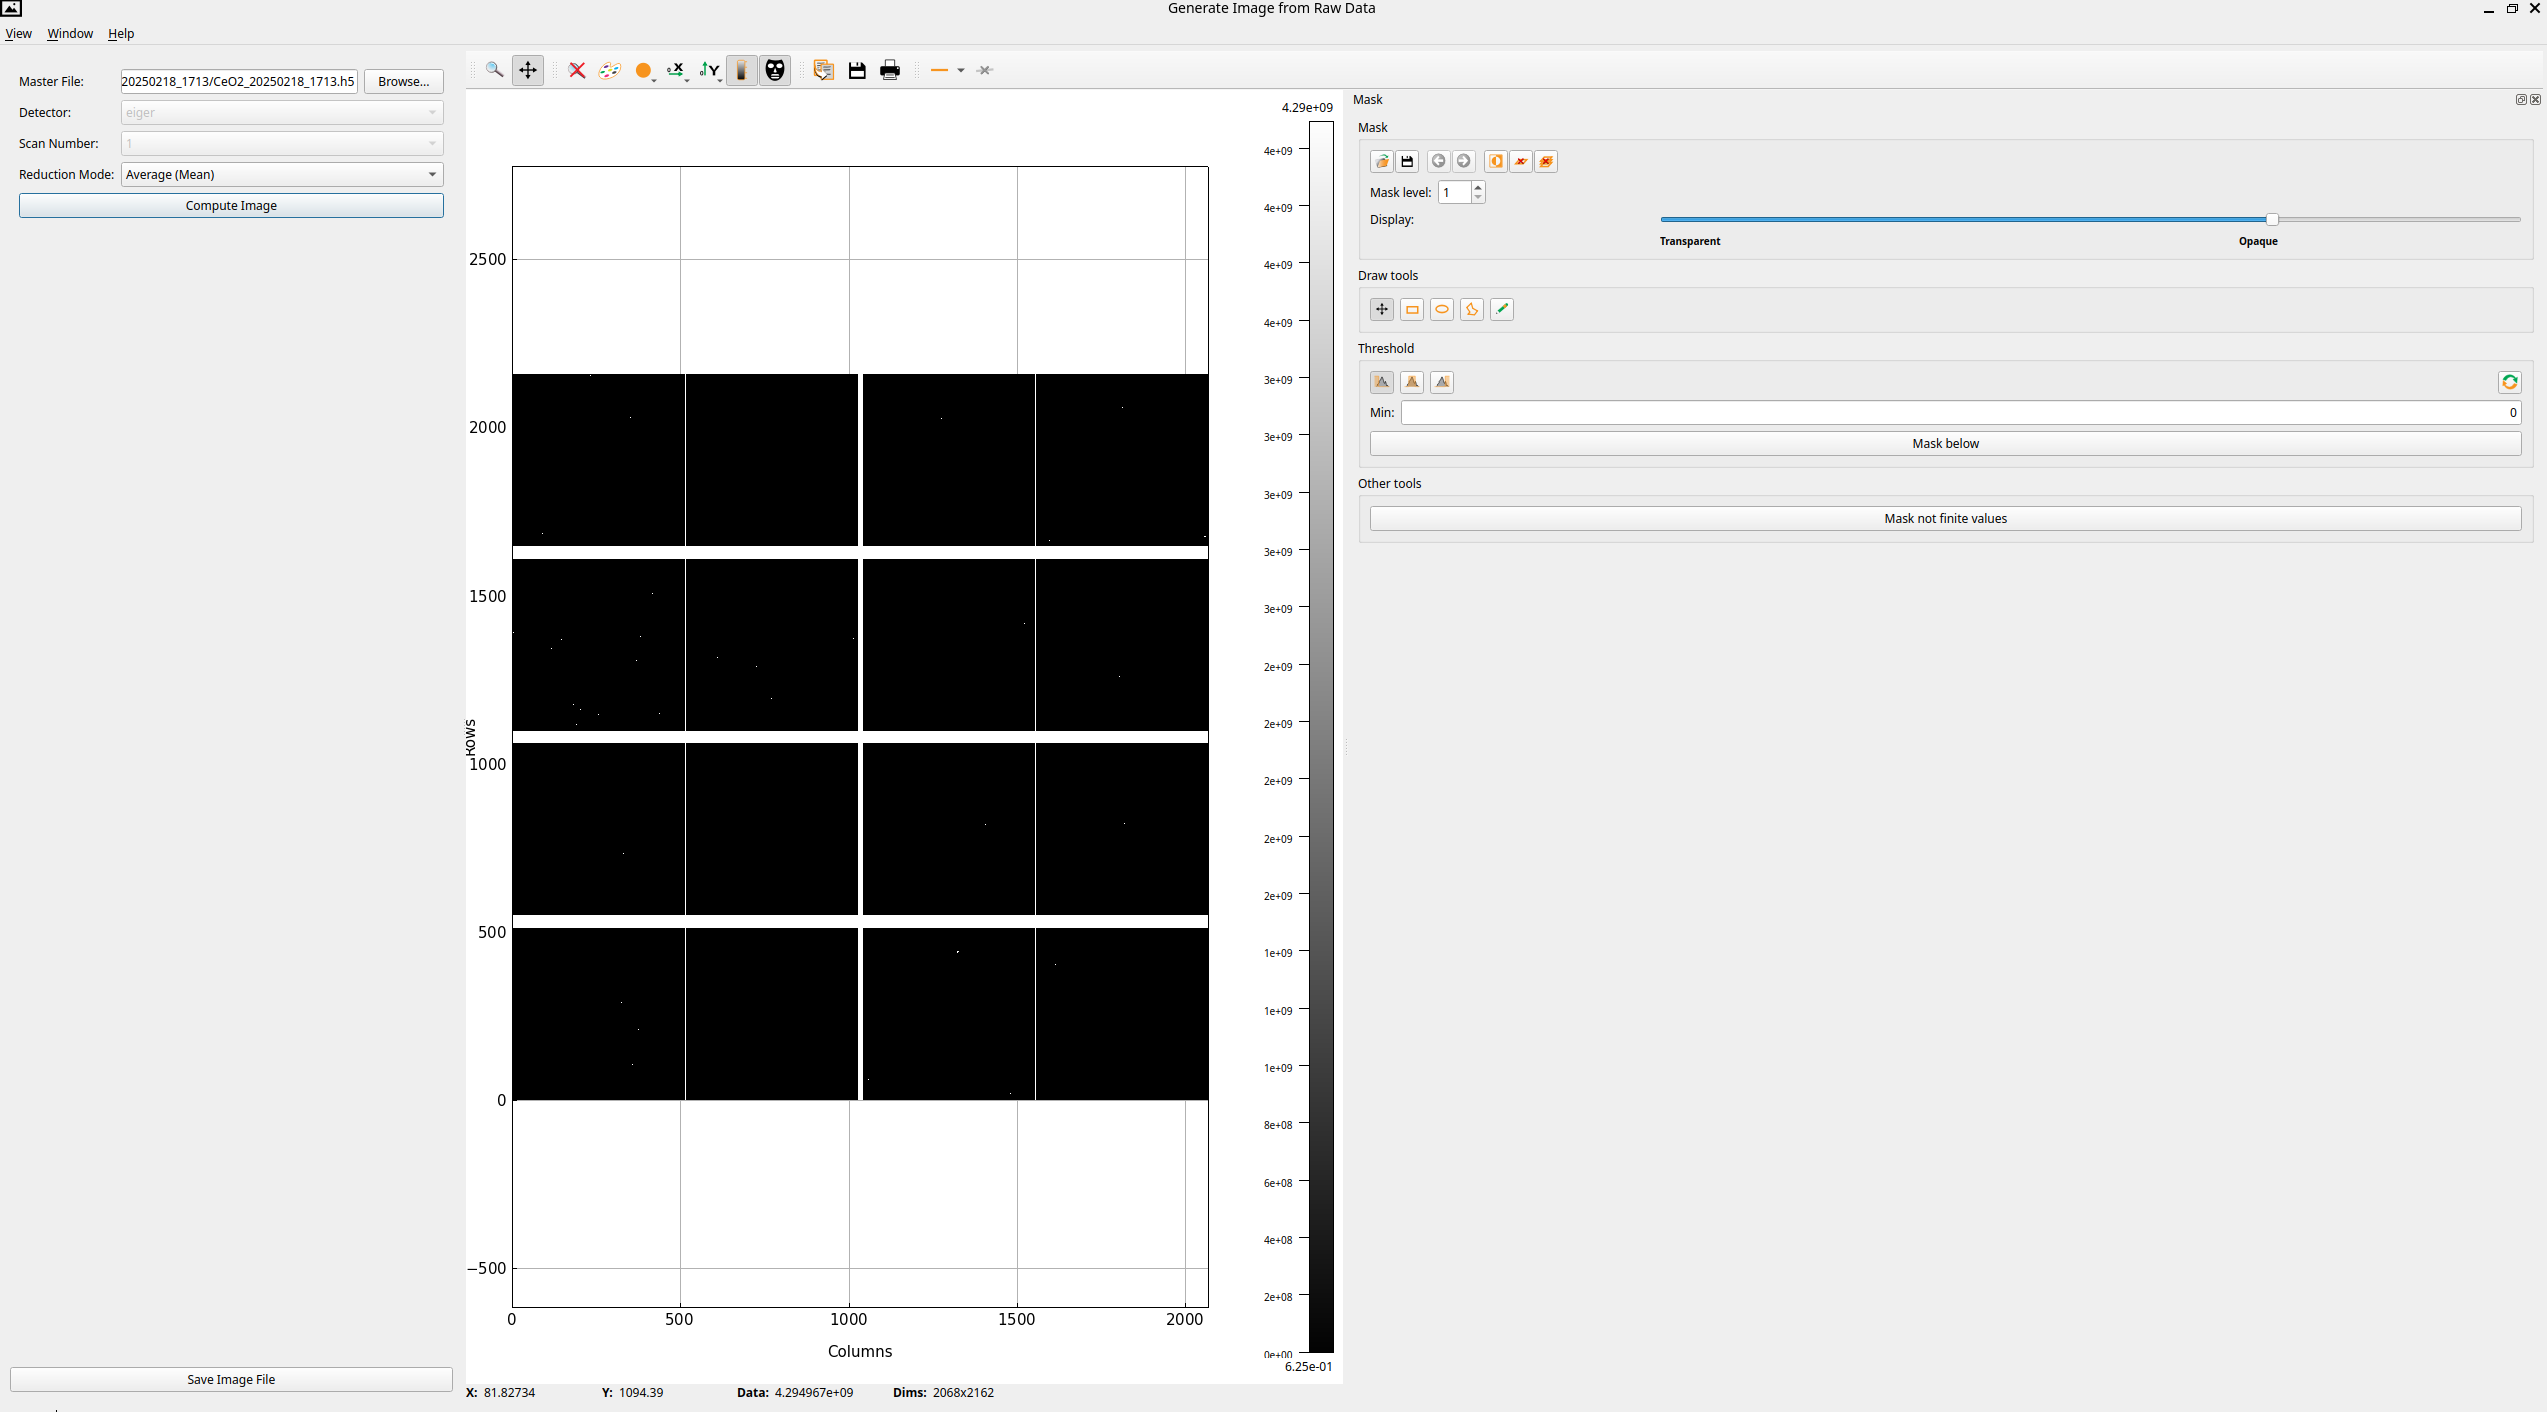
Click on the mask icon on the toolbar to open the silx mask tool. This tool allows to interactively draw a mask on the image.
Drawing Custom Shapes#
Use the toolbar options on the right to design the mask:
Selection Modes: Toggle drawing profiles like Rectangle, Polygon, or Freehand.
Flag Regions: Draw shapes across bad pixel clusters, high-intensity direct beam points, or the shadow of the beamstop to build your mask array.
Reset: If a selection layout goes wrong, click Clear Image in your control box to strip all custom masks back to zero.
Threshold: You can also use simple threshold mechanism (like min, max) to create mask image.